How to change Firefox bookmark icons (favicons) without extensions or addons!

Now that the Bookmark Favicon Changer extension for Firefox no longer works, you need an alternative way to customize the favicons of your bookmark items. And here it is!

1

1. Open up Firefox’s behind-the-scenes “profile” folder on your computer. On Windows 7/8, this is located at:

C:\Users\Your_Username\AppData\Roaming\Mozilla\Firefox\Profiles\Your_Profile_Folder

2. In that folder, create a new directory called “chrome”, if it doesn’t already exist.

3. Inside the “chrome” folder, create a new file called “userChrome.css”.

4. Open up userChrome.css and paste the following CSS code:

/* First line of userChrome.css must be this: */
@namespace url("http://www.mozilla.org/keymaster/gatekeeper/there.is.only.xul");

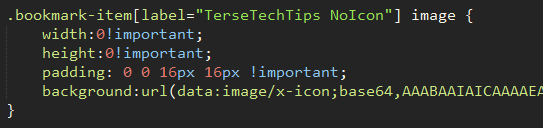
/* Custom favicon for this bookmark */
.bookmark-item[label="BOOKMARK_NAME_HERE"] image {
    width:0!important;
    height:0!important;
    padding: 0 0 16px 16px !important;
    background:url(BASE_64_STRING_HERE)!important; 
}

2

5. In the above code, there’s a few things you have to to edit:

i) Replace “BOOKMARK_NAME_HERE” with the title of your bookmark as it appears on your bookmark bar (e.g. “Reddit”).
You must supply a label, even if you don’t want any label to appear – see below for how to make this happen.

ii) Replace “BASE_64_STRING_HERE” with a base64-encoded string of your desired favicon, which you can obtain by uploading the icon to a website like this one.

3

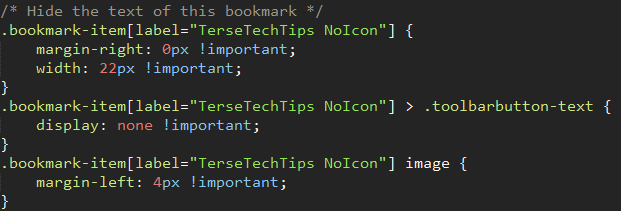
6. You must give your bookmark a label in step 5 for this to work – but if you don’t want your icon to have a label (text), just add some more code:

/* Hide the text of this bookmark */
.bookmark-item[label="BOOKMARK_NAME_HERE"] {
    margin-right: 0px !important;
    width: 22px !important;
}
.bookmark-item[label="BOOKMARK_NAME_HERE"] > .toolbarbutton-text {
    display: none !important;
}
.bookmark-item[label="BOOKMARK_NAME_HERE"] image {
    margin-left: 4px !important;
}

Remember to replace “BOOKMARK_NAME_HERE” with your (now invisible) bookmark label!

4

7. Save the file and restart Firefox.

5

Done.

Skype 3.6/3.8 no longer working on Windows.

If you use Skype 3.6 or 3.8 on Windows you’ve probably noticed a message in the past few weeks which says “Skype cannot connect.”

Unfortunately after much research I have found no workaround for this.

I do not recommend you upgrade to a newer Skype version because they are insecure. I’d recommend the excellent Trillian IM to use instead of Skype. It supports Skype accounts, so you can still talk to your Skype friends, any many other chat protocols.

I recommend you try it with the TrillianLiveMessageWindow skin which makes Trillian look like the old Windows Live messenger.

Trillianlivemessagewindow

Block and Auto-Reject Calls in Android without Extra Apps

You may be receiving nuisance or spam calls on your phone which you’d like to block or ignore. Luckily in Android, there’s a very simple way of doing so:

  1. Navigate to Settings -> Call Settings -> Call Rejection -> Auto Reject List -> Create.
  2. Enter the number, or part of the number, you’d like to block.
  3. Change Match Criteria if you’re looking to block a range of numbers which start or end with certain digits.
  4. Hit Save.

You can also access the above via the Dialer/Phone App -> Menu button -> Call Settings.

You can block calls from all Unknown numbers simply by ticking the box beside “Unknown” in the Auto Reject List settings screen.

I used this to block calls from nuisance callers 01792211845 and 01792211843 simply by entering 0179221184 and changing Match Criteria to “Starts With”.

Disable Skype’s forced updates

The Problem

Older versions of Skype (e.g. 3.6 or 3.8) are being forced to update, with a message which states “Skype must be updated now for security reasons”.

The Cause

Microsoft’s recent acquisition of Skype has meant an increased number of updates. If you’re like me, the necessity and legitimacy of these updates is questionable. Skype automatically downloads these updates in the background to your temp folder.

The Solution

This solution has several parts:

  1. Skype settings to prevent automatic updatesDisable Auto-Update in Skype’s settings.
    If you can still access and use Skype, go to Tools -> Options -> Advanced and ensure the auto-update boxes are all unticked.
  2. Block Skype’s update server using your computer’s hosts file.
    To do this, navigate to C:\Windows\System32\Drivers\etc and open up the file called “hosts” using a text editor.
    Enter the following on a new line at the bottom of the file:

    127.0.0.1   ui.skype.com

    Make sure you enter this on a new line at the bottom, not an existing line, and the line should not begin with a # symbol.

  3. Prevent Skype from sneakily downloading update files in the background.
    Skype downloads updates silently (and sneakily) to your temp folder. To ensure it can no longer do this:
    – Navigate to %temp%
    – Delete SkypeSetup.exe
    – Create a new blank text file in Notepad, and use File -> Save As to save it as SkypeSetup.exe
    – Right click your new file, choose Properties -> Security -> Advanced -> Change permissions -> Add -> type “Everyone” -> Choose “Deny” -> OK -> OK

Done.